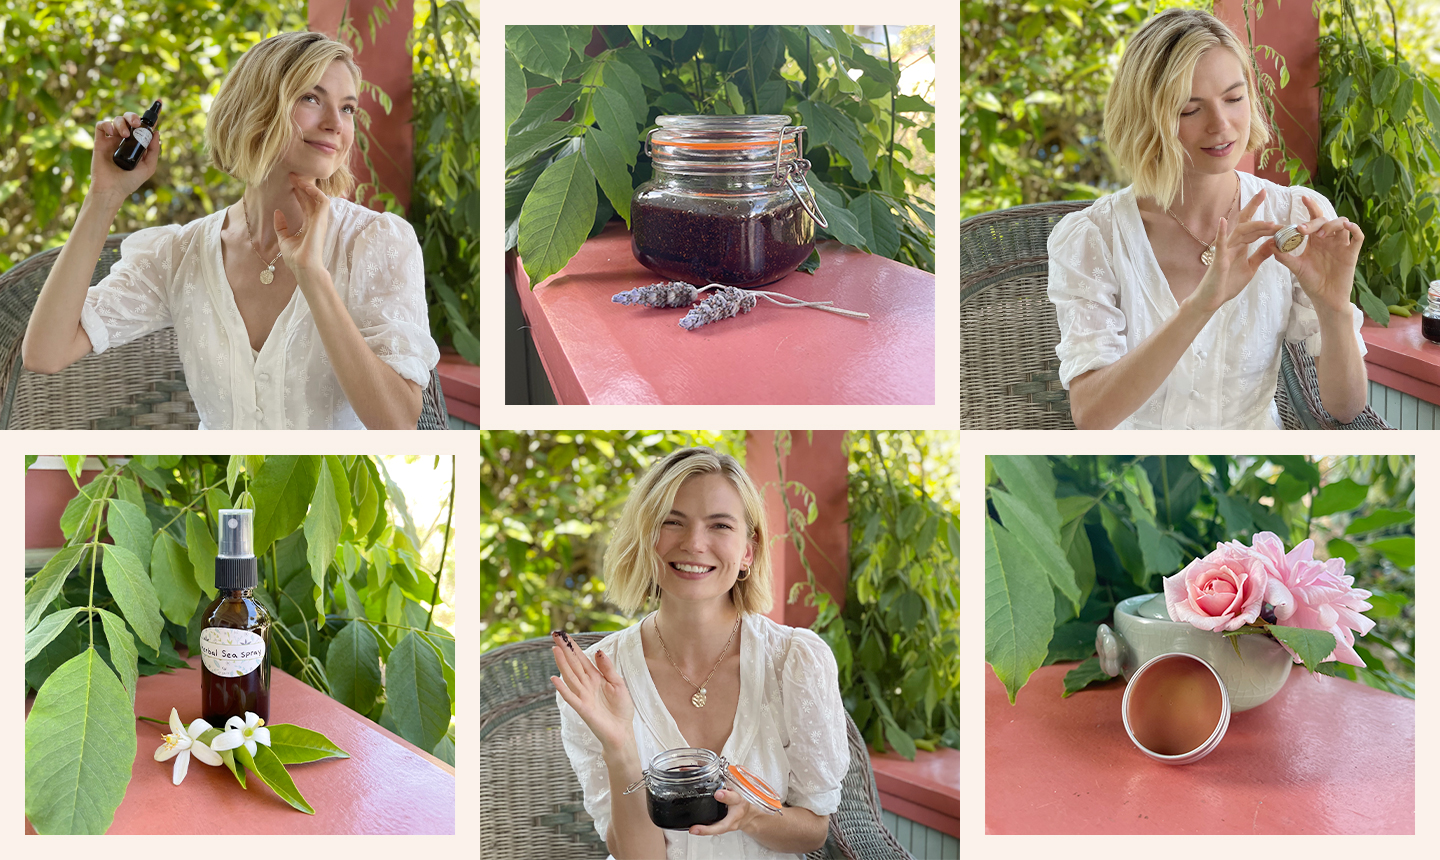
Meet Beck. She’s one of our runway models. And while she’s certainly a pro at all-things-fashion, she also happens to be an expert at making her own organic DIY beauty products. With just a few simple, clean ingredients, you can whip up some surprisingly impressive, high-quality products, turning your kitchen into your very own beauty bar.
Beck is walking us through how to create three different products. First up is a Coconut Coffee Scrub for maximum exfoliation. Caffeine is a great ingredient for the skin as it works to tighten, lift, and tone while the coconut will provide hydration and moisture. Next on the agenda is an Herbal and Hydrating Sea Salt Hair Spray to help achieve those coveted windswept, beachy waves. Last but not least is a nourishing Beetroot Lip Balm. Beets provide a natural stain (if you’ve ever chopped them, you know this), so it makes the perfect ingredient in a lip balm for a subtle tint that can be layered for a deeper shade. Take a look at the detailed recipes below along with instructions and Beck’s helpful tips and tricks!
Beachy Coconut Coffee Scrub

Materials
- ¼ cup fractionated coconut oil (liquid at room temperature)
- ½ cup ground coffee beans (you can reuse the grounds from your morning coffee, just allow them to dry out again first to avoid introducing water to the mix)
- ¼ cup raw honey (make sure it’s pure honey)
- ¼ cup coarse sea salt
- 10 drops vitamin E oil
- *Optional: 2 Tbsp sea kelp extract OR pure aloe vera gel (no additives)
- **You can also add an essential oil for scent—vanilla extract, lavender, or rosemary oil are good options with added skin benefits.
- Airtight glass mason jar for storage
- ***If the scrub seems too runny or oily, you can make it thicker by adding more coffee and salt.
Directions:
- In a glass mason jar, mix coffee grounds and sea salt.
- Mix the dry ingredients together and then begin to mix in the oils and liquids in any order.
- Once the liquid ingredients have been added to the jar, mix thoroughly to make sure everything is well combined.
Use the scrub in your shower without the water on (prepare to have a little bit of a mess). After you feel adequately scrubbed, turn the water back on at a lukewarm temperature to rinse off until you no longer feel too oily. If the water is too hot, it will melt everything off of your skin and you won’t be able to absorb as much of the goodness from the scrub. Don’t use soap—it will strip everything off of your skin. When you feel clean and moisturized, get out of the shower and gently pat yourself dry. Once again, you don’t want to rub your skin with the towel because it will transfer a lot of the residual oil and skin yumminess off of your skin and onto the towel. The jar can be left in your shower or anywhere that’s not in direct sunlight.

Herbal Sea Salt Spray

Materials
- 1 Tbsp raw sea salt or Himalayan pink salt (the more mineral rich and unprocessed, the better!)
- ½ Tbsp Epsom salt
- 1½ Tbsp sea kelp extract or pure aloe vera gel (aloe vera gel has a shorter shelf life, so try to use it quick!)
- 4 Tbsp distilled water (can use tap water, but it can contain microbes and chemicals like chlorine, so distilled is best)
- ½ tsp argan oil
- 2 Tbsp fractionated coconut oil (liquid at room temperature)
- 1½ Tbsp vegetable glycerin
- 10 drops of vitamin E oil
- 10-15 drops of essential oil (I’ll be using a blend of eucalyptus and lemongrass.) Some other beneficial blends for your hair and scalp are lavender and chamomile or grapefruit and bergamot.
- Spray bottle (ideally dark blue or brown glass to extend shelf life)
- Funnel for filling bottles
- Whisk
Directions:
- In a glass mixing bowl, mix together sea salt, Epsom salt, and distilled water—mix with a whisk until salt is fully dissolved.
- Mix in sea kelp extract or aloe vera gel—stir until fully dissolved.
- Mix in all remaining ingredients—mix oils and water even though there will be separation!
- Use the funnel to fill spray bottles and shake well before using to combine water and oils.
Apply to damp (not wet) hair and scrunch gently to help give hair some texture and definition. Don’t tousle unless you want to add volume to your hair. If you mess with it too much, you might break up the defined texture and make your hair fluffy. If that happens, you can just splash your hair with water and allow it to settle naturally again. Store out of direct sunlight.

Beetroot Lip Tint

Materials
- 1 Tbsp extra virgin coconut oil
- 2 Tbsp organic shea butter
- 2 Tbsp organic beeswax pellets
- 1 Tbsp beetroot powder
- 1 tsp jojoba
- 10 drops pure vitamin E oil
- 10 drops peppermint essential oil (or any scent you prefer!)
- Whisk
- Double boiler or small glass measuring cup inside of metal pot of boiling water (if using a measuring cup, you can pour directly from the cup instead of using a syringe)
- Small/medium medicine syringe (like for cough syrup—you can generally get them for free from a pharmacy)
- Small glass or tin containers (or used-and-sterilized cosmetics or honey/jam jars)
Directions:
- In a double boiler, melt coconut oil, shea butter, and beeswax (just get them hot enough to melt, don’t boil them). If you don’t have a double boiler, you can set a small glass measuring cup in a metal pot with enough water to boil, but not so much that it will spill or bubble over the top of the glass cup.
- Add jojoba, vitamin E oil, and essential oils to the melted mixture. Use a small whisk or fork to mix everything thoroughly.
- While stirring, slowly mix in beetroot powder. Don’t add it too fast or it might clump.
- Once everything seems thoroughly mixed and the beetroot powder has dissolved into the liquid mixture for a few minutes, turn the heat to low and prepare to fill your lip balm containers.
- Before filling your containers, I strongly suggest you either boil them and your syringe in a quick hot bath (not for thin plastic containers) or run them in the dishwasher on the sanitize setting to kill any bacteria that could be on them and clean off any surface dust or dirt.
- Once the containers and syringe are sanitized, you can begin filling them. I suggest setting them all on a plate (to catch any spills), as close as you can pack them (to minimize potential drippage). Whisk the mixture to make sure everything is still evenly distributed, suck up a syringe full of liquid (or pour directly from the cup), and slowly squirt it out into the container. Stay close to the container to prevent splashing and try to move as quickly as possible to keep the mixture from cooling and solidifying in the syringe or cup. If it does, you can dip it in the hot water from the double boiler and that should remelt it.
Your lip balm should be set and cool in a matter of minutes and ready for use within an hour. Once done, you can store at room temperature (not in direct sunlight or extreme heat).

When it comes to making your own beauty products, the key is using high-quality ingredients and sterile supplies. Make sure your hands are clean before applying anything directly to your skin. Have you tried making your own beauty products? We want to know how you did it! In the comments section below, share your own recipe with the cabi community and why you love it!