Question: “Where did you get that?!” Answer: “I made it.” We just love do a fun and fabulous DIY tie-dye project—tapping into your artsy side and getting your hands dirty (metaphorically speaking of course…that’s what the plastic gloves are for!). Nothing beats that feeling when you finally get to undo all your ties and reveal your one-of-a-kind design. It’s the perfect way to add your personal twist (literally) to an item in your closet. That’s why we’re going to help you learn how to tie-dye, right here, right now.
It can seem like a big undertaking, but with the proper tools and instructions, you’ll be a pro in no time (and try practicing on an inexpensive white tee before committing to a favorite piece!). Tie-dyeing is a quintessential summer activity and a great way to bond with your kids, spending quality time outdoors in the sunshine! Keep reading to learn how to tie-dye then have at it.
Here's what you'll need:
Cooling Rack
This is incredibly important to keep the dye from pooling beneath your shirt and ruining your design!
Cookie Tray
Makes for easy cleanup
Aluminum Trays
For letting your shirt rest overnight
Paper Towels
Plastic wrap
Dye Kit
Pick your color palette and make sure your kit includes:
Dyes
Rubber bands
Plastic gloves
Here's what to do:

Set up your space
If possible, do your project outside since things can get messy
Place your cooling rack on top of a cookie tray to keep the mess contained
Have your aluminum trays nearby


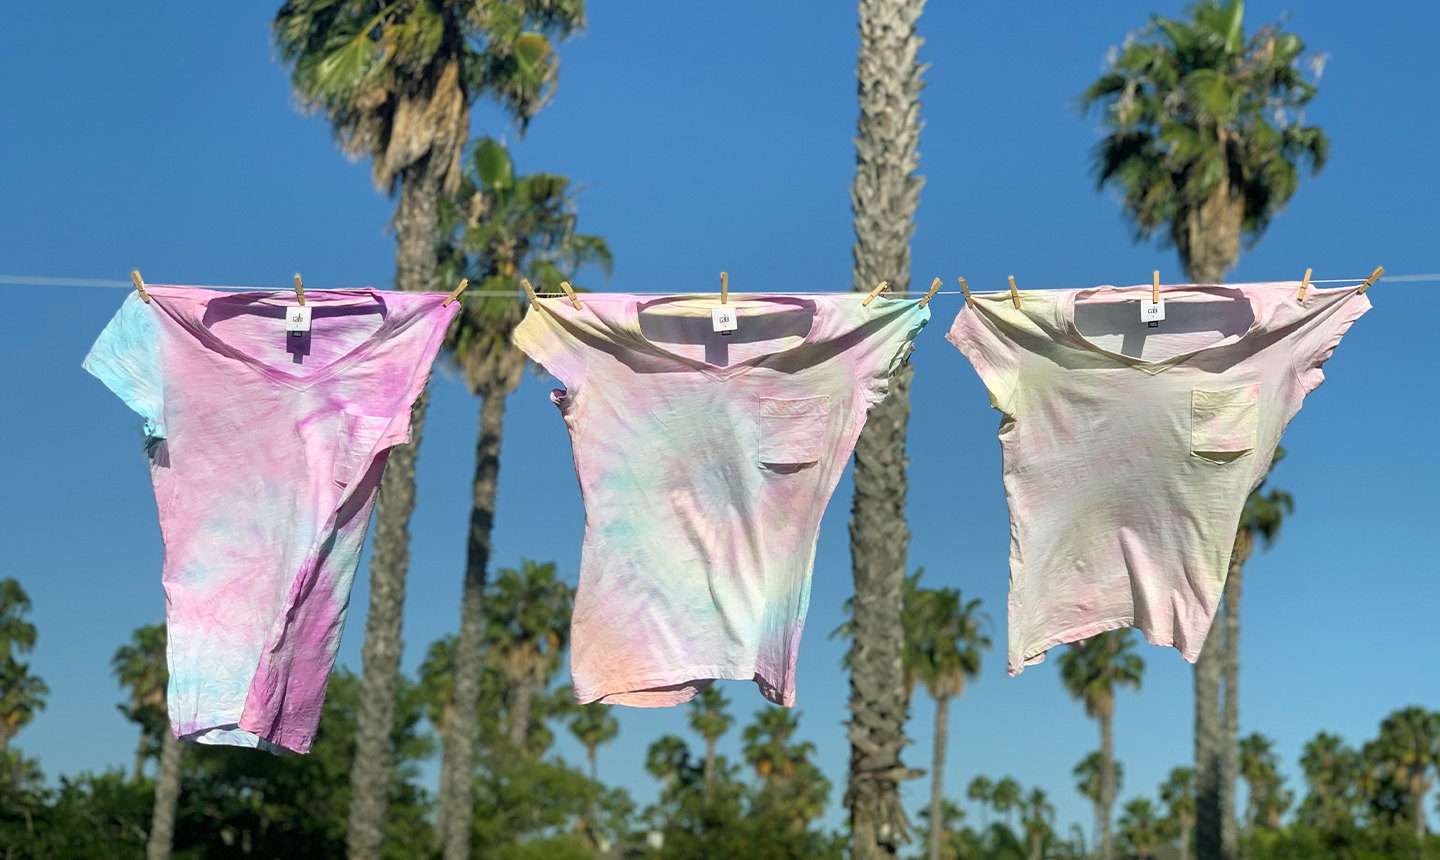
Dissolve the dyes you want to use in your squeeze bottles. For this tutorial, we went for a pastel look so we only dissolved some of the color powder into the squeeze bottles and then tested the color on paper towels.


Make sure you’re using a laundered shirt made with natural fibers such as cotton, silk, or rayon for best absorption. We’re using the white Fold Pocket Tee which is 100% cotton. Dampen the shirt, but make sure it isn’t soaking wet.


Next, use rubber bands to tie up your shirt, creating whatever designs you want.
For a double swirl look:
Lay shirt out flat.
Pinch the shirt with 2 fingers in the upper right corner.
Begin twisting you’re the fabric, but don’t twist entire shirt. You will need enough fabric for the second swirl.
Pinch the shirt with 2 fingers in the lower left corner.
Begin twisting the fabric in the opposite direction of the first swirl. Do not untwist other swirl while twisting fabric.
Using 3 rubber bands, tie up shirt to divide it into 6 equal parts.

For a bunched look
Lay shirt out flat
Start from several different spots around the outside of the shirt and start folding the shirt back and forth. Toward the center.
Push the entire shirt together into single bunch
Tie up the shirt with rubber bands randomly. There is no specific pattern.

For a single swirl,
Lay shirt out flat
Pinch the shirt with 2 fingers right in the center.
Begin twisting the fabric until the entire shirt is in a single swirl
Using 4 rubber bands, tie up the shirt to divide it into 8 equal parts.


Place the shirt bundle on the cooling rack above the cookie tray.


Put on your gloves then squirt the dye onto sections of the shirt, using the rubber bands as guides. Be sure to leave some white space for a good balance of color.


Wrap the shirt in plastic wrap


Place your dyed shirt onto an aluminum tray and let it sit for several hours, preferably overnight.


While keeping the shirt on the aluminum tray, remove the rubber bands and wash the shirt out in your bathtub.

Hang your shirt out on a line to let it air dry.


Wash separately from other lights for the first few washes.
There you have it, your step by step guide for tie-dyeing. Easy as 1, 2, 3… okay maybe a few more steps than that, but we promise it’ll be worth it, and you’ll feel so accomplished afterwards!
Calling all tie-dyers! We want to see your designs. Snap a pic wearing your own creations and post it to Instagram #ToDyeFor, tagging us @cabiclothing. We can’t wait to see what you made! And hey, if you’re worried about the mess or feeling like this project isn’t for you, you can still participate in the tie-dye summer trend with our Woodstock Top, a hand-dyed top where we did all the hard work for you!